티스토리 API 사용하는 방법을 설명합니다. 토근이라는 걸 발행하기 위해 몇가지 절차를 진행합니다. 본인 티스토리에 로그인 한후 아래 사이트로 이동합니다.
https://www.tistory.com/guide/api/manage/register
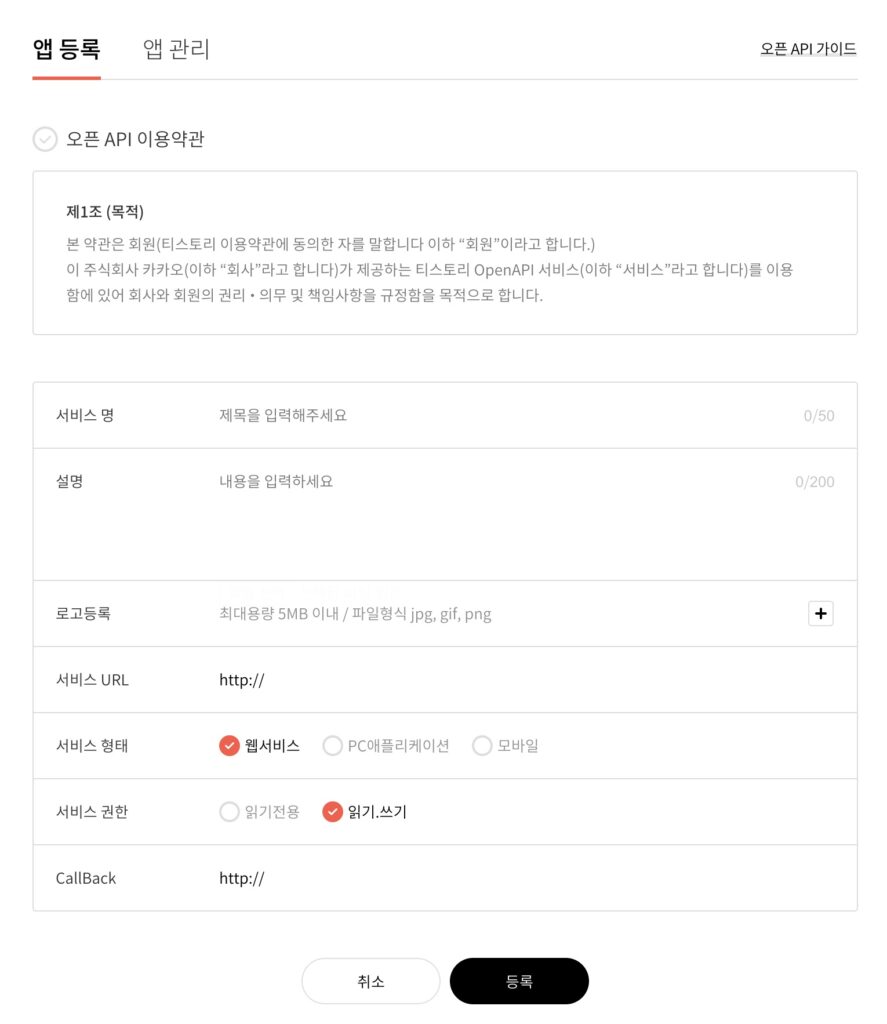
- 서비스명 : 본인 입맛에 맞게 작성(티스토리 명 등등.. )
- 서비스 URL : https://example.tistory.com (티스토리 URL)
- 서비스 형태 및 권한 : 기본값
- CallBack : 서비스 URL과 동일하게
적용예시
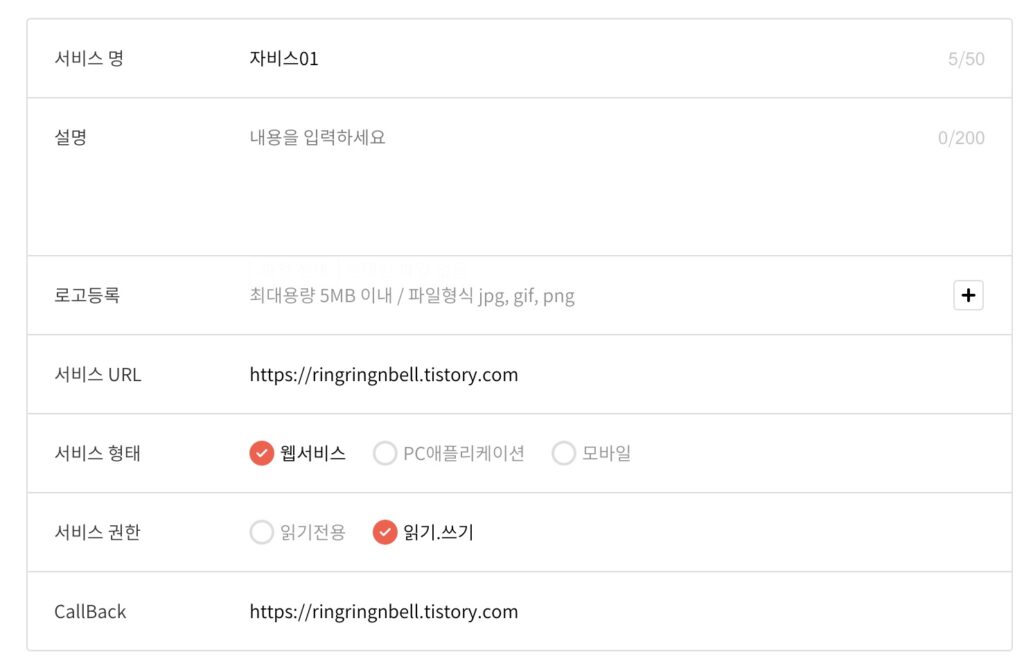
티스토리 블로그 1개 만들어서 다음과 같이 입력해봤습니다. 중요한건 티스토리 URL만 잘 입력해주면 됩니다. / 등이 URL끝에 붙게 되면 전혀 다른 URL이 되니 .com으로 끝나게 입력하세요.
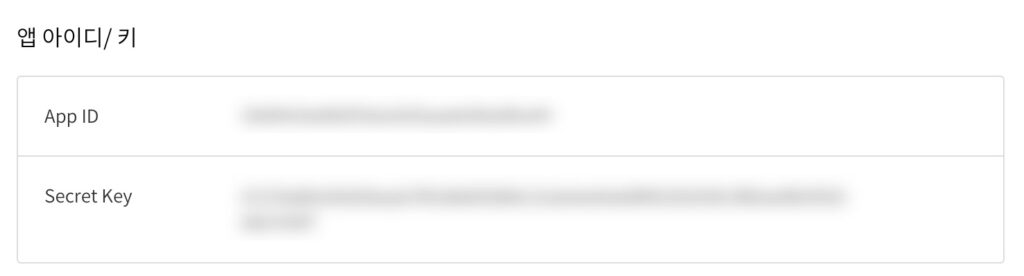
입력이 끝났으면 등록 버튼을 클릭합니다. 앱 아이디와 시크릿키를 발급받을 수 있습니다. 해당 정보는 액세스 토큰을 발급받기 위한 정보로 딱 한번만 쓰입니다.
그럼 엑세스 토큰을 발급받아 보겠습니다.
액세스 토큰 발급
티스토리 API를 활용하려면 엑세스 토큰만 있으면 됩니다. 토큰은 한번 발급받으면 변하지 않으며 항시 같은 토큰으로 API를 활용할 수 있습니다. 토큰 발급을 위해 파이썬으로 이동합니다.
import requests

# API 키와 리디렉션 URI 설정
client_id = '6eb277d77d1e098xxxxxxxx02213685f1' # 발급받은 App ID
client_secret = '6eb2e0982350882xxxxxxxxxx4b2f94120f4014ded774d9f84141f833d854910' # 발급받은 Secret Key
redirect_uri = 'https://ringringnbell.tistory.com' # API 신청시에 기입한 리디렉션 URI
state = 'javis'

# 인증 페이지 URL 생성
auth_url = f'https://www.tistory.com/oauth/authorize?client_id={client_id}&redirect_uri={redirect_uri}&response_type=code&state={state}'

# 인증 페이지로 리디렉션
print('다음 URL로 이동하여 인증을 완료하세요:')
print(auth_url)

# 리디렉션된 URL에서 code 받기
# 인증 페이지에서 인증 받은 후 URL에 있는 코드를 입력하면 됨
code = input('code를 입력하세요: ')

# Access Token 요청
token_url = 'https://www.tistory.com/oauth/access_token'
params = {
    'client_id': client_id,
    'client_secret': client_secret,
    'redirect_uri': redirect_uri,
    'code': code,
    'grant_type': 'authorization_code'
}

response = requests.get(token_url, params=params)
access_token = response.json()['access_token']

print(f'Access Token: {access_token}')
pip 명령어를 통해 requests 라이브러리만 import 한다면 위 코드는 정상작동 합니다. 입력해야 하는 변수는 총 4개입니다.
- client_id : 발급받은 App ID 넣으세요
- client_secret : 발급받은 Secret Key 넣으세요
- redirect_uri : API 신청시에 기입한 리디렉션 URI (본인 티스토리 URL 넣으세요)
- state = 넣어도 그만 안 넣어도 그만!
실행 결과

“다음 URL로 이동하여 인증을 완료하세요” 밑에 나온 URL을 엽니다.
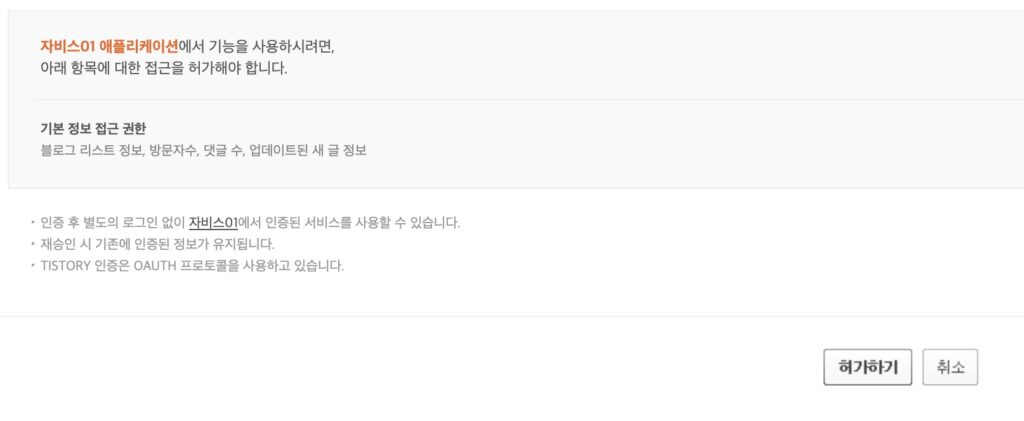
허가하기를 클릭하면 리다이랙션 URL로(내 블로그)로 이동하는데 이때 상단 URL에서 code 값을 가지고 옵니다.

이렇게 URL 뒤에 코드값이 나옵니다. 해당 코드를 파이썬 소스코드에 넣습니다.

이렇게 입력하고 실행하면 에러문구가 뜨는데 상관없습니다. 엑세스토큰은 정상 확인이 가능하거든요.

다음과 같은 에러문이 출력되는데 여기서 엑세스토큰만 따로 발췌하여 API를 활용할 수 있습니다. 엑세스 토큰은 한번만 발행하면 되고 같은 토큰으로 티스토리 블로그에 계속 접근이 가능합니다.
토큰값 변경없이 계속 글을 발행할 수 있다는 말이죠.
다음 시간에 토큰값을 가지고 API를 활용하여 포스팅을 해보도록 하겠습니다.
답글 남기기
댓글을 달기 위해서는 로그인해야합니다.